
A question that we got asked through our ask the expert corner is how to set up the new (ish!) Twitter header that has appeared. Is a very easy process once you know how but we thought we would quickly show you so that you can go and create your masterpiece.
Once logged into Twitter you can select the ‘Me’ tab at the top left – that will show you the header area that we are talking about, its not the little avatar that you see accompanying the tweets but more the top of your timeline so that if people are searching for you that’s what they will see. (Very similar to both Facebook and Google+ format)
As it is part of your Social Media, it would be a good idea to have all of these headers looking the same, but you will have to do some editing of them as each platform takes slightly different images. With Twitter the recommended image size is 1252 x 626, now while this seems huge, actually it does shrink to fit nicely. The problem is that you will have to choose your image carefully, as both your avatar and also the description of your company appears on top of the header, so you do need to think what images you can use.
As you can see below, we have still used our ‘take a peek’ image but we have had to move the eyes and text wider apart to ‘wrap around’ the avatar and text.

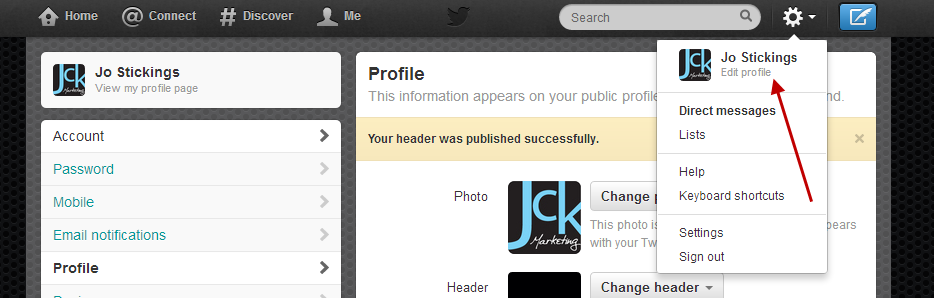
So all you need to do once you have created the image (and you might like to read about picmonkey to help you achieve that) the rest is straight forward. Go to the settings tab and click on edit profile and then hit the grey button that says change header (see image below)
Upload your image in the normal way and sit back and admire your handy work!